Cryptographically sign all of your commits with a GPG key managed by Keybase, proving to GitHub and the world that you are a real person who really wrote your code and getting that neat Verified badge next to all of your commits.
Along the way, we’ll also make sure everything is set up in a way that plays nicely with RStudio.

Overview
Did you know it’s incredibly easy to spoof commit authors with git? Basically, you only need to tell git you’re a different person.
git config --global user.email "hadley@..."
git config --glboal user.name "Hadley Wickham"

# pretend to commit as Hadley
git commit -m "Fix recode() arguments to new = old"
git doesn’t do anything to verify the commit author and, while GitHub will try a little harder than git, it’s surprisingly easy to pretend to be somewhere else in a git repo.
This can obviously lead to problems (that are admittedly mostly theoretical in my daily life) and there’s a relatively easy solution: signed commits. With signed commits, you cryptographically sign each commit with your private key that only you own, and GitHub (and others) will verify your signature with the public key pair. When GitHub knows that the real you made the commit, it adds the green ![]() badge.
badge.
In this post, I’ll show you how to use Keybase to create your own GPG key. Then we’ll set up git to use this key to sign your commits, and along the way we’ll configure git to work with RStudio, too. I’m using a Mac, but the process is very similar for Linux/Unix machines1.
Set up signed and verified commits
Install Keybase and GPG
We need at least four pieces of software to make this work. I’m hoping you have git2 and RStudio installed; the two new things you’ll probably need are Keybase and gpg.
The easiest way to install both is with the MacOS package manager, homebrew. (If homebrew is new to you, head over to https://brew.sh/ to learn more and to grab the installation command.)
brew install gpg
brew install --cask keybase
The first line installs gpg, the GNU Privacy Guard command line tool. It manages the cryptographic steps: signing or encoding files with your personal GPG key.
Keybase is key directory that maps social media identities to encryption keys in a publicly auditable manner3. In other words, Keybase is place to store encryption keys and to link your identity (and those keys) to your public identities such as your accounts on Twitter or GitHub. One advantage of Keybase is that its app and command line tool make it relatively easy to generate and store GPG keys. It’s also a great way to share that key between your own computers.
Create a GPG key with Keybase
If you don’t have a Keybase account, open the Keybase app that we installed with brew. Their app will guide you through the process of creating an account.
Once you have a Keybase account, head back to the command line4 to create a new GPG key. Note that the keybase cli uses the pgp command, but we’ve been talking about GPG keys. To most people, the terms GPG and PGP are functionally interchangeable: GPG is the GNU Privacy Guard which is an open-source version of PGP (Pretty Good Privacy).
keybase pgp gen --multiEnter your real name, which will be publicly visible in your new key: Garrick Aden-Buie
Enter a public email address for your key: garrick@adenbuie.com
Enter another email address (or <enter> when done):
Push an encrypted copy of your new secret key to the Keybase.io server? [Y/n] Y
When exporting to the GnuPG keychain, encrypt private keys with a passphrase? [Y/n] Y
▶ INFO PGP User ID: Garrick Aden-Buie <garrick@adenbuie.com> [primary]
▶ INFO Generating primary key (4096 bits)
▶ INFO Generating encryption subkey (4096 bits)
▶ INFO Generated new PGP key:
▶ INFO user: Garrick Aden-Buie <garrick@adenbuie.com>
▶ INFO 4096-bit RSA key, ID B606B038A1A5CE20, created 2021-09-12
▶ INFO Exported new key to the local GPG keychainTo recap the process:
keybasewill first ask you for your real name and email address. Make sure these match your identity on GitHub, or at least a verified email that you use on GitHub.Then choose
Yto push a copy of the key to Keybase andYagain to add give your private key a passphrase.After a few seconds, Keybase asks for your account password and then prompts you to enter a passphrase for your GPG key.
At the end of the output, note your key’s ID — in my case, B606B038A1A5CE20. You should also be able to find your key on your Keybase profile, or list your local keys that gpg knows about with
gpg --list-secret-keys --keyid-format LONG/Users/garrick/.gnupg/pubring.kbx
---------------------------------
sec rsa4096/B606B038A1A5CE20 2021-09-13 [SC] [expires: 2037-09-09]
87888BBEBC09E6093A8310F9B606B038A1A5CE20
uid [ unknown] Garrick Aden-Buie <garrick@adenbuie.com>
ssb rsa4096/F4435076C9C363BD 2021-09-13 [E] [expires: 2037-09-09]Notice that we again see our key id, B606B038A1A5CE20, in the third line of the output. There’s also the [ unknown] on line 5 next to our name. This indicates that gpg isn’t totally confident about this key yet and we need to tell gpg that it can be trusted.
Trust your own key, ultimately
Open the gpg interactive prompt to edit your key, then run trust, choose I trust ultimately and finally run save.
gpg --edit-key B606B038A1A5CE20gpg> trust
# Please decide how far you trust this user to correctly verify other users' keys
# (by looking at passports, checking fingerprints from different sources, etc.)
#
# 1 = I don't know or won't say
# 2 = I do NOT trust
# 3 = I trust marginally
# 4 = I trust fully
# 5 = I trust ultimately
# m = back to the main menu
#
# Your decision? 5
# Do you really want to set this key to ultimate trust? (y/N) y
gpg> save
# Key not changed so no update needed.Now if you run gpg --list-secret-keys again, you’ll see [ultimate] next to your name.
gpg --list-secret-keys --keyid-format LONG/Users/garrick/.gnupg/pubring.kbx
---------------------------------
sec rsa4096/B606B038A1A5CE20 2021-09-13 [SC] [expires: 2037-09-09]
87888BBEBC09E6093A8310F9B606B038A1A5CE20
uid [ultimate] Garrick Aden-Buie <garrick@adenbuie.com>
ssb rsa4096/F4435076C9C363BD 2021-09-13 [E] [expires: 2037-09-09]Configure git to always sign your commits
Setting git to always sign your commits is straightforward. Update the git global config to sign commits using your default key with the following two commands, replacing my key id in the first command with your key id.
git config --global user.signingkey B606B038A1A5CE20
git config --global commit.gpgsign true
Add your key to GitHub
Now you need to tell GitHub about your new GPG key. Using your key id, ask Keybase to export the public key that matches your private GPG key. Here we’ll pipe it to pbcopy to copy it into the system clipboard.
keybase pgp export -q B606B038A1A5CE20 | pbcopyThen head over to github.com/settings/keys, click on New GPG key, and paste and add your key into GitHub.
Check your signed commit powers
At this point, git will try to sign your commits, but if you’re also using MacOS like me there’s a good chance you’ll run into a problem when you try to commit a file.
# in a git repo
touch test.txt
git add test.txt
git commit -m "test signed commits"
# error: gpg failed to sign the data
# fatal: failed to write commit object
This error message isn’t entirely helpful, but you can try to sign some random text with gpg to expose the underlying error.
echo "test" | gpg --clear-sign-----BEGIN PGP SIGNED MESSAGE-----
Hash: SHA256
test
gpg: signing failed: Inappropriate ioctl for device
gpg: [stdin]: clear-sign failed: Inappropriate ioctl for deviceThe problem in my case is that I have an “Inappropriate ioctl for device”. Take that error to your favorite web search engine and you’ll find a resolution. If you also run into this ioctl error, you need to add the following line to ~/.zshrc (if you’re using Z shell, the latest default on MacOS) or ~/.profile:
export GPG_TTY=$(tty)Save the file and then close and re-open your terminal window. When you test gpg signing again, you should be prompted with a full-terminal prompt to enter your password.
echo "test" | gpg --clear-sign
 ┌───────────────────────────────────────────────────────────────┐
 │ Please enter the passphrase to unlock the OpenPGP secret key: │
 │ "Garrick Aden-Buie <garrick@adenbuie.com>"                    │
 │ 4096-bit RSA key, ID B606B038A1A5CE20,                        │
 │ created 2021-09-13.                                           │
 │                                                               │
 │                                                               │
 │ Passphrase: _________________________________________________ │
 │                                                               │
 │         <OK>                                   <Cancel>       │
 └───────────────────────────────────────────────────────────────┘
Enter your key’s passphrase and, if everything works, you should see a message like this:
-----BEGIN PGP SIGNED MESSAGE-----
Hash: SHA256

test
-----BEGIN PGP SIGNATURE-----

iQIzBAEBCAAdFiEEh4iLvrwJ5gk6gxD5tgawOKGlziAFAmE/UYkACgkQtgawOKGl
ziAzgg/7Bl6cCapi+k2OrxPafl811G4x7fC4PQWCJKWXinUjkZK/8+o6jM+ZQp+4
gc1wv0gBfNyKNkTmMg/qiQhuLYiujSH9pyjaoMgO9QoYvUuPituSjV7RQOfAhlHD
N+wgkACPd3PH2kQVFj8Jw3Nkesrpgby9t/S6sSiLZf284rMfx31ua1/l4tsHWowP
5a+FRujDtarWJ1/zL9pgMkr9kkWEejqpzGVLrVKrB3xsPLyGnPf8BW+an7CwkkDS
umJulX3Ck1u14DRgIyj4VdwfCkkCle0uyZcLorZsqDP5GC/3ZKcpDe6XgSSKz0O0
HVvm4bTqBBmesVNWHVuFmYGmmXFU/sYvYoHOy3wvLiCu/hbRhBvboUcogW79/PWR
Gw/DYln5W1ClIKH9LsU0GpydSTMMhXZySEp+r1OCl4sQqKCe6Ka3ex+3lOHyym7F
U5rgfH6tmu6U2Jtn8QEFg106vxQDQ76TIRVS9xvicH98PJQnhoyg3jtu5tMbITz1
oev0Z11vq76mw3MFmVx455AVqxplGM/4qB9HsmNWTsi0fGoFa/vlbBN3vJQn0xaX
2PSXKWlkZiyd+WplWsOH2OnZ8V8s2cHNxlKsSPrWQNflYsDtO8vANwAFjiJK2Bkq
YLPCcwzEVSwFrLRRXt5Crcpc/32ZqrfvcLe0G+ACWQYAhktwJnQ=
=S1iU
-----END PGP SIGNATURE-----
And if you try to git commit again, it should work!
git commit -m "test signed commits"[main (root-commit) 4c4573f] test signed commits
1 file changed, 0 insertions(+), 0 deletions(-)
create mode 100644 test.txtNote that you can be extra sure by looking at the git log with signatures.
git log --show-signaturecommit 4c4573f2fbed44eab6c0f4a08a38a9f8292580cf (HEAD -> main)
gpg: Signature made Mon Sep 13 09:34:59 2021 EDT
gpg: using RSA key 87888BBEBC09E6093A8310F9B606B038A1A5CE20
gpg: Good signature from "Garrick Aden-Buie <garrick@adenbuie.com>" [ultimate]
Author: Garrick Aden-Buie <garrick@adenbuie.com>
Date: Mon Sep 13 09:34:59 2021 -0400
test signed commitsInstall a pinentry app
Remember that console dialog that appeared when we committed our test commit above? Yes, it’s fun and retro, but it isn’t going to work inside RStudio when the IDE runs git commands for you to commit your files.
In this step, we’ll install pinentry-mac, a modern method for providing a passphrase for your key, that also integrates with MacOS’s Keychain so you don’t have to enter the passphrase with every commit.
If you’re using Windows, you might want to check out the Gpg4win app. On Linux, you may want to use pinentry-gnome3. Finally, you could also configure gpg-agent to cache your passphrase if none of the above options work for you.
Installing pinentry-mac is easy with brew:
brew install pinentry-macThen we need to configure gpg to use pinentry-mac for its passphrase needs. Add the line below to ~/.gnupg/gpg-agent.conf:
# vim ~/.gnupg/gpg-agent.conf
pinentry-program /usr/local/bin/pinentry-mac
Or you can create the file and add the line in one command:
echo "pinentry-program /usr/local/bin/pinentry-mac" >> ~/.gnupg/gpg-agent.confFinally, restart the gpg-agent so that pinentry-mac is used for passphrase entry.
gpgconf --kill gpg-agentWhen you create your next commit in RStudio, you’ll be prompted with a dialog box to enter your passphrase. If you select the Save in Keychain option, you won’t be prompted again; gpg and git will use the passphrase in your Keychain to sign your commit with the GPG key you created with Keybase!
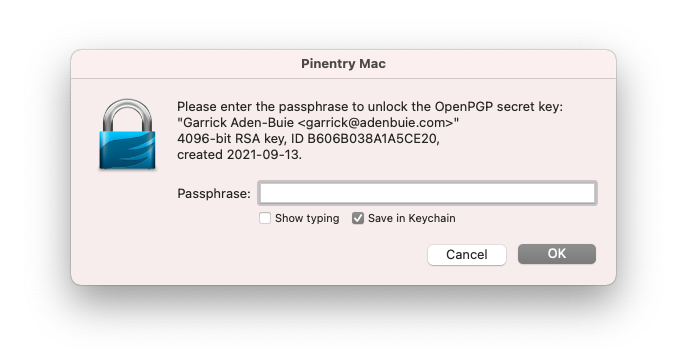
pinentry-mac dialog window asking for the GPG key passphrase when signing a commit for the first time.Import your GPG key on another computer
If you’d like to use the same GPG key on another computer, first make sure that you have Keybase and gpg installed. Then you can export the existing key (both its public and secret versions) from Keybase into gpg:
keybase pgp export -q B606B038A1A5CE20 | gpg --import
keybase pgp export -q B606B038A1A5CE20 --secret | gpg --allow-secret-key-import --import
Again, you’ll want to tell gpg to trust this key ultimately.
gpg --edit-key B606B038A1A5CE20
gpg> trust
# pick "5 = I trust ultimately"
gpg> save
Links and Resources
Here’s a short list of links that were helpful to me while figuring out this process. Hopefully, everything above just works for you, but if not then maybe the posts below will help you out:
Appendix
Use gpg-agent to cache your passphrase without a pinentry GUI
If you don’t want to or can’t install a pinentry app, you can get gpg-agent to cache your passphrase for a fixed period of time, say 8 hours.
When you start your day — or when the cache expires — you’ll need to sign something or commit once from the command line to re-enter your passphrase.
The first step is to configure gpg-agent to remember your key’s password for the day (8 hours or 28,800 seconds).
# ~/.gnupg/gpg-agent.conf
default-cache-ttl 28800
max-cache-ttl 28800
You’ll need to restart gpg-agent so that it picks up the new configuration.
gpgconf --kill gpg-agentAt this point, any git commit will automatically be signed using your default key. The first commit of the day will require you to enter your password, which does mean that the RStudio Git UI won’t be able to sign the first commit until you’ve asked gpg to sign something for you.
To get around this, you can unlock your gpg key by signing anything at the start of your work day or whenever the 8 hour time limit runs out.
echo "open sesame" | gpg -s > /dev/null
# prompt for password
Footnotes
Windows users, I’m sorry! I don’t own anything that runs Windows. 😒↩︎
You’ll need
gitversion 2.0 or later. Check withgit --versionor upgrade git to the latest version withbrew install git.↩︎https://en.wikipedia.org/wiki/Keybase↩︎
You could also create a GPG/PGP key in the Keybase app in the identities section of your profile, but I’m using the command line so it’s easier to copy-paste.↩︎